5 Fun Pumpkin Science Experiments for Little Scientists
Fall is in full swing, and that means it’s pumpkin season! What better way to get your little scientists excited about science than with some fun pumpkin science experiments? These hands-on activities are the perfect way to combine STEM activities with all things pumpkin. Whether you’re working with younger children or older kids, these pumpkin science activities will spark curiosity, foster critical thinking, and make learning a fun way to explore the world around them. Let’s dive into five amazing pumpkin science experiments your students will love!
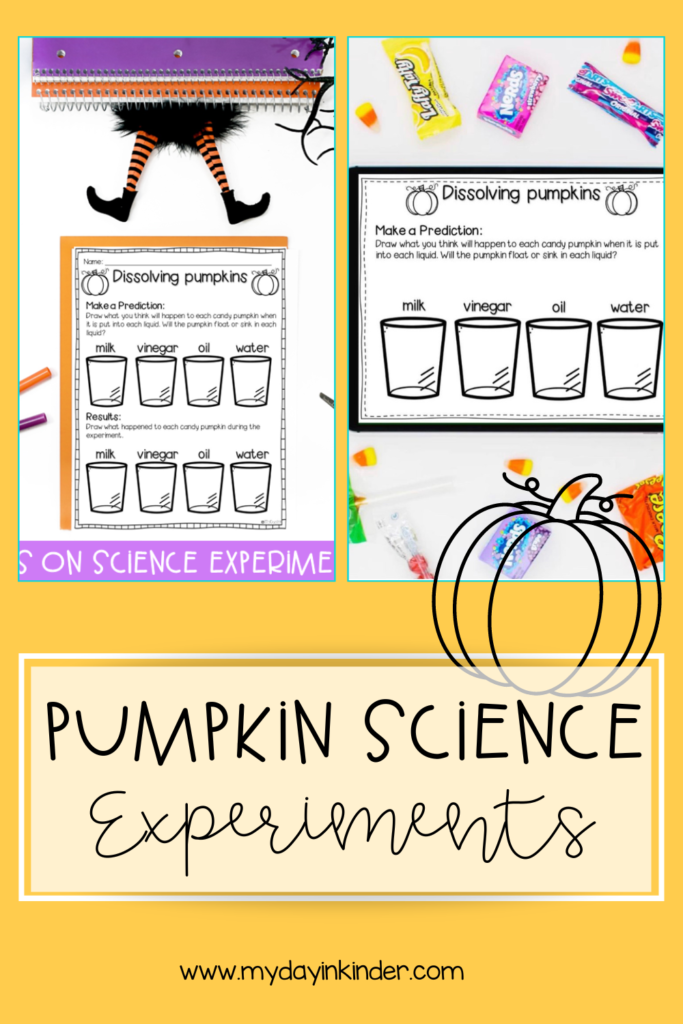
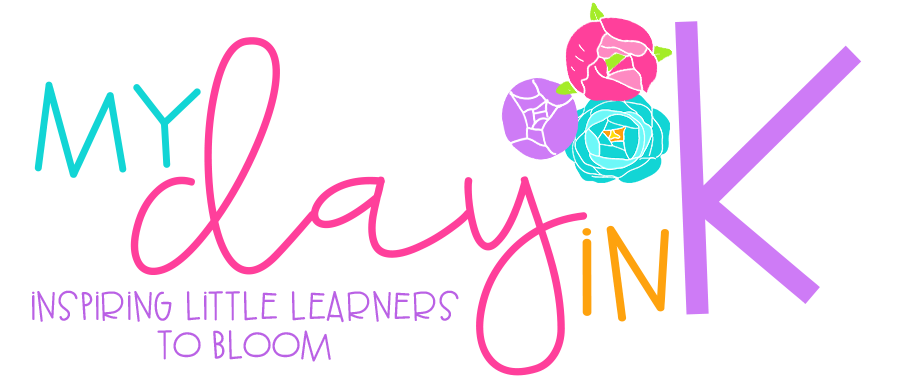
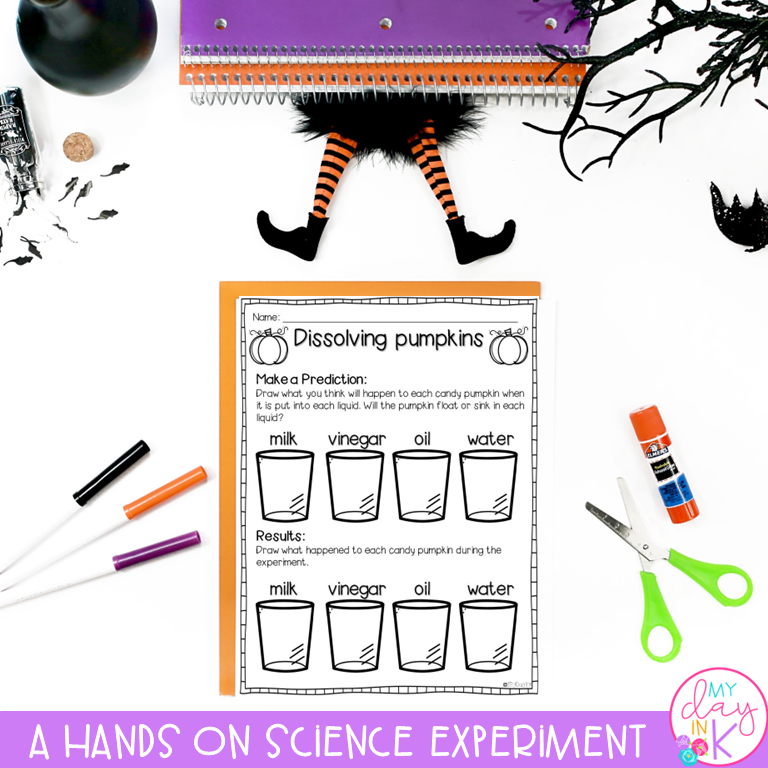
Pumpkin Candy Dissolving Experiment
Who doesn’t love a good candy experiment? For this activity, grab some candy pumpkins from the grocery store and set up a simple experiment to see how long they take to dissolve in different liquids. This is a cool dissolving pumpkins experiment that kids of all ages can participate in!
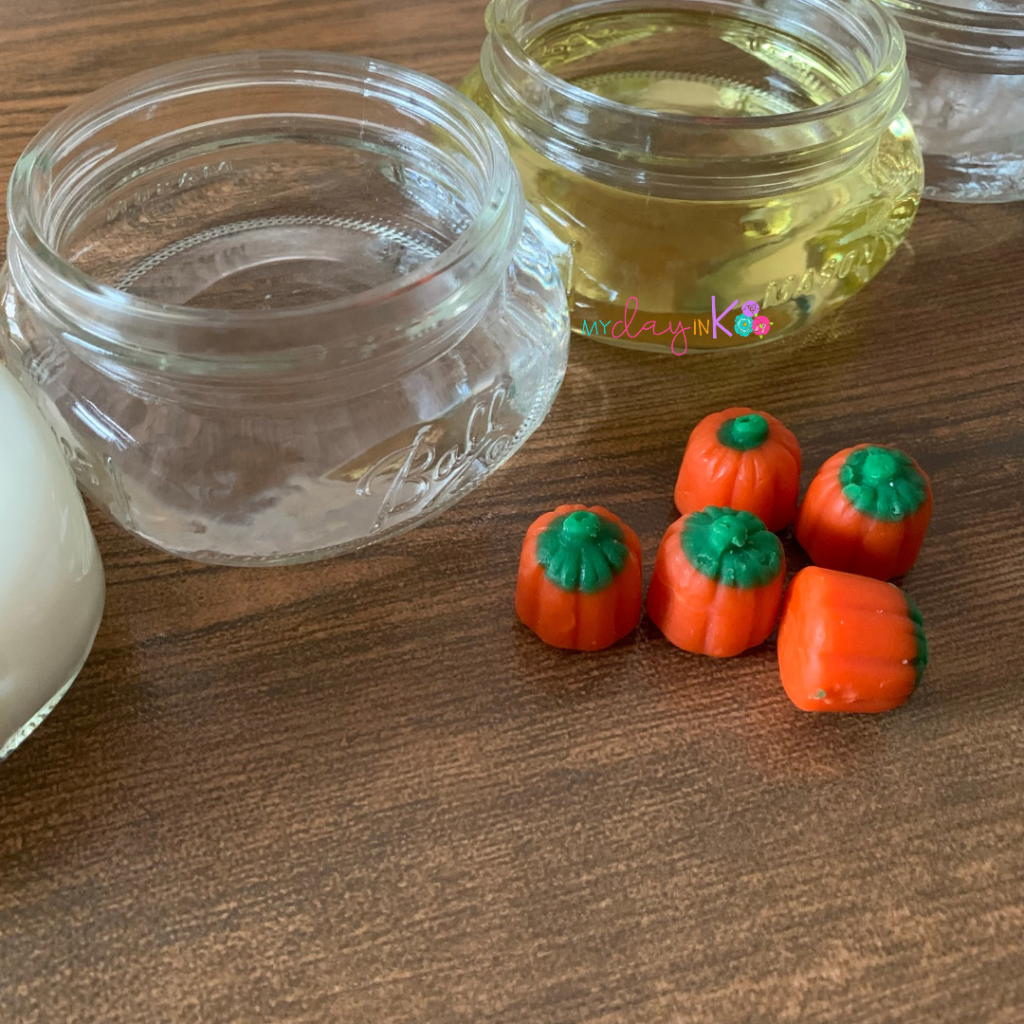
What you need:
- Candy pumpkins
- Clear cups
- Different liquids like vinegar, lemon juice, warm water, etc.
- Anchor chart to record the results
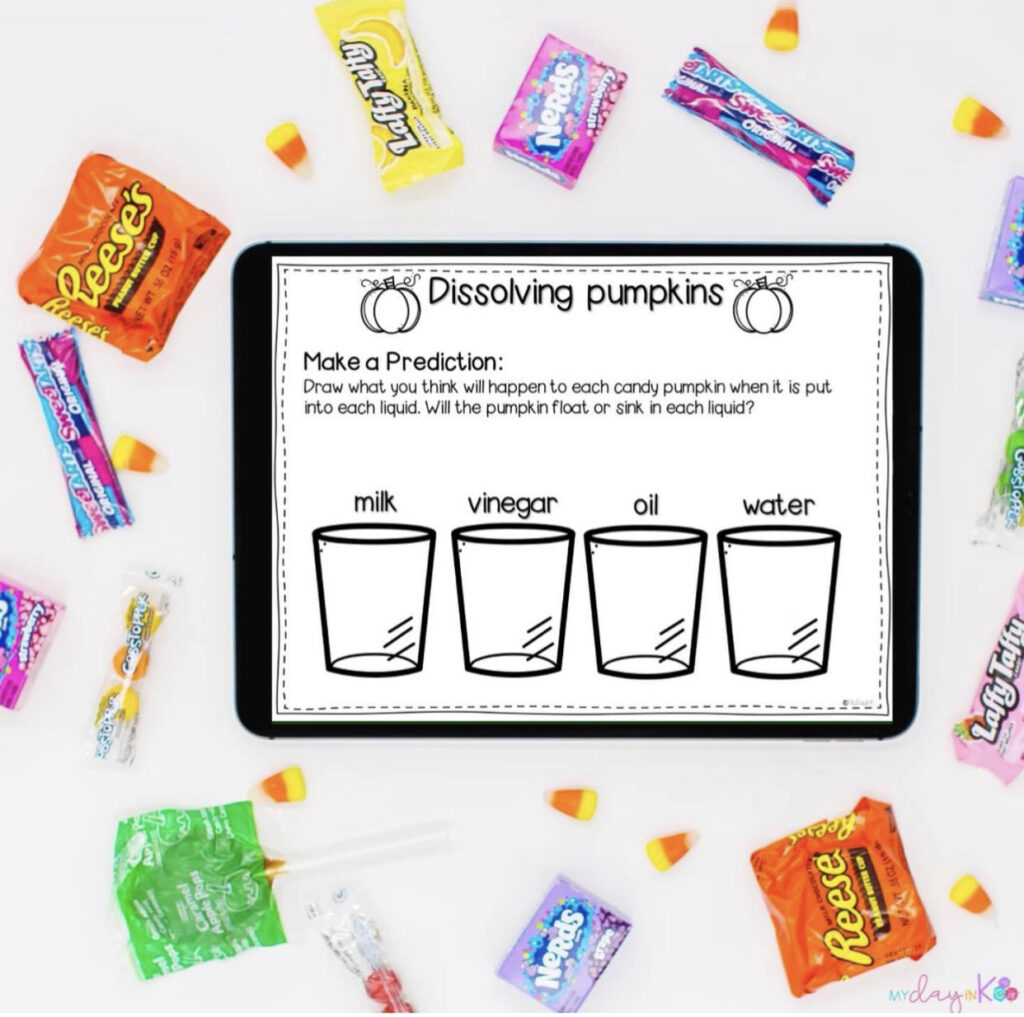
Step-by-step directions
- Fill each cup with a different liquid.
- Drop one candy pumpkin into each liquid and have the students observe what happens over time.
- Record how long it takes for the pumpkins to dissolve in each liquid using the scientific method—hypothesize, observe, and analyze!
This pumpkin experiment is a great way to introduce students to concepts like chemical reactions and states of matter while making it all so much fun!
Erupting Pumpkin Volcano
If your students love volcanoes, this experiment will be a hit! The erupting pumpkin volcano is a classic theme that combines fall with a little explosion.
What you need:
- A small pumpkin (hollowed out)
- Baking soda
- Vinegar
- Food coloring (optional)
- Dish soap for extra fizz
Step-by-step directions:
- Carve out the top of the pumpkin and scoop out the seeds (save them for another experiment!).
- Fill the pumpkin with baking soda and add a few drops of food coloring.
- Pour in some vinegar and watch the chemical reaction as the pumpkin erupts like a volcano! Adding a little dish soap makes it extra foamy and fun.
This activity is a great chance to talk about carbon dioxide and the reaction between vinegar and baking soda. Plus, it’s an exciting way for students to visualize science concepts in action.
Pumpkin Life Cycle Investigation Tray
Teaching about the life cycle of a pumpkin? Create a pumpkin investigation tray that helps students explore the parts of a pumpkin and its life cycle in a hands-on way.
What you need:
- Real pumpkins
- Pumpkin seeds
- Parts of a pumpkin cards
- Magnifying glasses
Step-by-step directions:
- Cut open a small pumpkin so students can see the insides of a pumpkin—the fibrous strands, the seeds, and the flesh.
- Place different pumpkin parts (stem, seeds, skin) in a tray for students to explore with magnifying glasses.
- Discuss the life cycle of a pumpkin, from seed to pumpkin, while students investigate.
This is a great time to use an anchor chart to visually map out the pumpkin’s life cycle. It’s also a perfect way to introduce younger students to science concepts while keeping the activity hands-on and interactive.
Pumpkin Jack – The Rotting Pumpkin Experiment
Want to teach about decay and the life cycle in a different way? The rotting pumpkin experiment, also known as Pumpkin Jack, is a fun experiment that allows students to watch how a pumpkin changes over time.
What you need:
- Small pumpkin
- Anchor chart to track observations
- Optional: a second pumpkin kept in a dry area to compare
Step-by-step directions:
- At the start of the fall months, carve a small pumpkin with your students. Name it “Pumpkin Jack.”
- Leave Pumpkin Jack outside and check on it weekly, making observations on how it changes (color, texture, and shape).
- Track the changes on your anchor chart and discuss what’s happening on a cellular level as the pumpkin rots.
This activity can last all season long and is a great way to introduce the concept of decay while reinforcing the scientific method as students make predictions and record data.
Pumpkin Slime Experiment
What kid doesn’t love slime? Combine that love with the fall pumpkin theme by making your own pumpkin slime! This is the perfect time of year to get messy and let students experience the sensory fun of slime-making.
What you need:
- Pumpkin guts from a carved pumpkin
- Liquid starch
- Glue
- Orange food coloring
Step-by-step directions:
- Scoop out the pumpkin guts and seeds.
- Mix the guts with glue, liquid starch, and orange food coloring to make your slime.
- Let the kids knead and squish the slime for a full sensory experience!
Not only is this activity full of messy play, but it’s also a fun way to talk about the parts of a pumpkin and the chemical reactions that happen when making slime.
Wrapping Up Pumpkin Science Fun
Pumpkins offer so many opportunities for hands-on science experiments, and this time of year is the perfect time to dive in with your little learners. From the erupting pumpkin volcano to dissolving candy pumpkins, these experiments provide an exciting way to explore science concepts while making learning so much fun.
So, grab some pumpkins, set up your science center, and get ready to see your students light up as they become young scientists exploring the fall season in creative and engaging ways! If you are looking for some fun Halloween party ideas, click here.